Showing posts with label art quilt. Show all posts

Thursday, December 27, 2018

Stitching Away

Two very quick progress reports today.  First, the sample of the Upcycle project:
Image and design copyright RPS

I simply took a piece of muslin and drew a portion of the trick or treat lettering in marker.  Then, made some hasty sketches of chickens and free motion quilted them on my little Elna model 50 "Grasshopper."  Then I began to go over the marker letters in chain stitches, at the same time auditioning two different weights of WonderFil Eleganza thread.  In all of the drawing classes I have had, my teachers always stressed the importance of drawing directly from the real thing, don't try to draw from memory.  These chickens are proof of that advice. 

I have dabbled a little bit with one of the little Mardi Gras series - the ones where I was supposed to finish one a week - here is some hand embroidery that I am pleased with:
Image and design copyright RPS

I am off to at least find pictures of chickens.  There is a barn full of chickens within sight of my house, but I don't know the neighbors well enough to ask them if I could hang out there for a while drawing their laying hens. 

Tuesday, December 25, 2018

Progress on the Upcycle entry

Finally, I am rolling along with something!  My entry for the SAQA Upcycle show is taking shape.  My first step was to cut the base fabric, and baste the large chicken feed sack pieces to it.  I also raw edge appliqued some small printed feed sack pieces to have a little color where the chicken feed bag pieces don't quite meet.
Image and design copyright RPS

Next, I played with the location for the secondary focal point pieces - chunks cut from a vintage printed tablecloth (check out the mid-century mod chickens) and a fun hanky with some more funky chickens on it.
Image and design copyright RPS

Once I had a good idea where the focal points will go, I started to place pieces of printed feed sack in the lower right corner.  The pieces will be raw edge appliqued, and I will use the same technique in the upper left corner.
Image and design copyright RPS

My next step is to make a small sample of the trick-or-treat part of the whole piece feed sack and try quilting it with thread sketched chickens.  I plan on outlining the trick-or-treat lettering in dark gray chain stitching.  Check back on Thursday to see how that goes.


Tuesday, October 2, 2018

World War I Poppies - Finished!

Here it is, my own mixed collage interpretation of the World War I poppies:
Image and design copyright RPS

Here is a detail of the letter:
Image and design copyright RPS

The letter is actually a note on a postcard (copied onto fabric) that came with one of those wonderful scrapbooks that I found earlier this year.  There is no doubt that they came from a local family.  The postcard is a double length one:


The sender was apparently training at Camp Sherman in Chillicothe, Ohio.  The card is postmarked August 22, 1918 to a resident of Quaker City, Ohio.  Judging from the message, it was before the devastating influenza outbreak that occurred that year.  I wonder if the sender made it through the epidemic, and if he ever made it overseas.  The message reads:
        "Hello Rodney - How is the pike job coming?  We had some try out on Liberty trucks like they            take through there last Friday.  We will be driving trucks in France within a month from today if          we get over all OK.  We have a dandy pair of driving gloves & we get a Norfolk overcoat at the          port of embarkation wherever that will be we don't know.  But we can get a few shots of good              French wine, ha ha.


Tuesday, September 25, 2018

World War I Challenge Progress

Sadly, I am missing the entry deadline for this quilt, it is still not finished.  I'm not upset by missing the deadline, I will still finish the quilt and since I am going to be a vendor at the show it was to be entered into, I will have it on display (and for sale) in my booth.  I have a few more things to add to it, but here are a couple of detail images of the quilting and the very cool stamens in the poppies (hand stitched - straight stitches with French knots).  Enjoy!

images and design copyright RPS

This week is quieter than last, so I really have every intention of posting on Thursday... will it be about the finish of this quilt, or something else?

Tuesday, September 18, 2018

World War I Challenge

Yikes!  It has been a while since I posted here.  I have gotten wrapped up in  the World War I challenge piece that I mentioned previously.  The challenge is a poppy themed quilt, inspired by the poem, "In Flanders Fields."  Here are some in progress images:

First, my initial idea involved rubbings from gravestones in a nearby cemetery.  I only found a metal medallion indicating the grave of a World War I veteran.  In my collection of fabric collage stuff, I found a vintage hanky with some red poppies on it, and a felt tobacco premium flag  (Belgian flag, of course) from the World War I era.  I wanted those two items to be a part of the collage.
Image and design copyright RPS

Adding the flag and hanky would be the last steps in the collage, at this point I really needed some poppies.  I free-motion quilted the outlines of the flowers and leaves:
Image and design copyright RPS


Then, I colored the poppies with crayons, and heat set them by ironing.
Image and design copyright RPS


At this point, I wanted to add some detail with hand stitching, so I auditioned the flag and hanky again, changing the planned locations for them.  I didn't want to hand stitch where the extra pieces would cover my hard work.
Image and design copyright RPS

Check back on Thursday to see how the hand stitching and additional quilting turned out.

Tuesday, August 28, 2018

Assorted Side Projects

Why, why, oh why did I buy a bushel of cucumbers at the produce auction?  Because I had no idea how many of the little green guys I would need for a batch of bread and butter pickles.  I've never made pickles before, but I really wanted to try this year.  The yield was at least 24 pints of bread and butters, and an unrecorded amount of dill spears - my mom took home a bunch of pints, so I don't know the exact figure. 

The moral of this story is: don't hold back, just jump in and do what you want to do!  The pickles are delicious, and I still have fresh cucumbers - lots of them.

I have set the 8 X 10" flower series aside for a few days, I have been working on a World War I commemorative piece for a challenge.  Here are two steps in the development of the 8 X 10" prototype for the final piece:
Image and design copyright RPS

Step one: a grave marker rubbing with a Shiva paint stick and free motion sewn "drawing" of poppies.
Image and design copyright RPS

Step two: color the poppies with crayon and Pentel Fabric Fun pastel dye sticks.  Hand stitching added to center of the poppy on the right.  One evening's work, that's all.  I'm off now to start the actual challenge piece.

Tuesday, August 21, 2018

Another Ten Minutes

We all would love more time to create, but we all have busy lives - believe me, I'm right there with you!  I have a point with my "ten minutes" series.  I waste a lot of time everyday messing around with truly foolish stuff, and in breaking the progress of this small art quilt into ten minute increments, I am hoping that I am inspiring you to find a few minutes each day to pursue something that you have been wanting to do.  Give up ten minutes of internet time, skip a TV show for a half hour of good creative time, work on something while sipping your morning coffee, or while waiting for a pot of water to boil.  At the end of one week, astonish yourself with how much you have done on a project.
Image and design copyright RPS

The next ten minute step on my Joe-Pye-Weed mini collage was to couch yarn for the stems, and spot glue the leaves in place so that with another ten minute block I can sew the leaves into place.  After that, I will be ready to start hand stitching the pink florets.  I am looking at the real thing as I work on this, but I am not trying to make an exact botanical illustration, it is a personal interpretation of a flower that I love.

I'll get back to the day lily next week...

Thursday, August 2, 2018

In One Hour

With peach and blackberry on my mind, as promised I allotted one hour to come up with a base for a fabric collage.  First, I made a very quick selection of fabrics and ironed them:


Next, I cut several sized of strips, and started sewing them together:

Moving on, I kept trimming where needed and sewing pieces to create not one, but two sections of pieced fabric, until they were big enough to be able to get 8 X 10" pieces out of them.


Here's the final result, two collage bases, each 8 1/2 X 10 1/2, in less than one hour. 
All images and designs copyright RPS

Yes, the size is small, but think about finishing things quickly.  If you are pressed for time, look for small projects.  You won't get overwhelmed, and your confidence will grow as you get satisfaction in finishing something in days or a week or two.

Next week, find out how I embellish the two pieces.  I honestly have no finished image in mind right now for these.  I am simply playing with a color palette.


Thursday, March 22, 2018

Breaking the Rules

Today I resumed working on an art quilt that will definitely horrify traditional quilters.  Here is a detail of it:


This is a ragged old printed tablecloth that I covered with crayon rubbings of gravestone cravings, two shocking "violations" right there.  What self-respecting quilter would use a torn and stained tablecloth in a quilt, not to mention scribbling all over it with crayons?  I'm not stopping there with the upheaval of quilting rules, I am putting the tablecloth - a light value piece of fabric, over a black background!  So much for "work light to dark," this one is dark to light.

Now, my intent with this quilt is really not to shock the traditional quilters, or anyone.  I started this more as a challenge to myself to make something out of the worn-out tablecloth that I got stuck with from an auction box lot.  This is even more of a challenge for me as this quilt is the largest piece I have attempted.  It will finish at about 50 X 58, certainly not close to bed quilt size, but new territory for me.

Thursday, December 21, 2017

One Dollar, Unlimited Inspiration

Not having learned traditional quilting means that I have no qualms about doing somewhat unorthodox things to fabric.  I have recently amassed a collection of new rubber stamps for my art journaling class supply base.  Why use them just on paper?  I have already used them on my "What's Your Story" challenge entry in the Mutton Hill Quilt Show:


Since I was stamping on the quilt after putting all three layers together, I had a lot of ink "over-slop."  The stamps sunk into the soft surface and left the excess ink that was picked up.  I probably over inked the stamps too, but everything remained legible.  I'm fine with that.


I am still adding to my collection of alphabet stamps, I just bought a vintage set of them at the local junk auction for $1. 


I should have sorted through them before the auction started, as a few letters are missing.  No problem, I could just mix fonts in a sort of ransom note style.  Then, there is always Ebay; I found a probably identical set of stamps, complete.  This second set is already on its way to me.  I will keep and use both sets, of course.

Tuesday, October 31, 2017

The Purple Collage, the Finale

Earlier this year, or maybe even last year, I periodically documented the creation of a fabric collage here.  It was finished for entry into the Mutton Hill Quilt Show, and here it is at the show:
Image and design copyright RPS

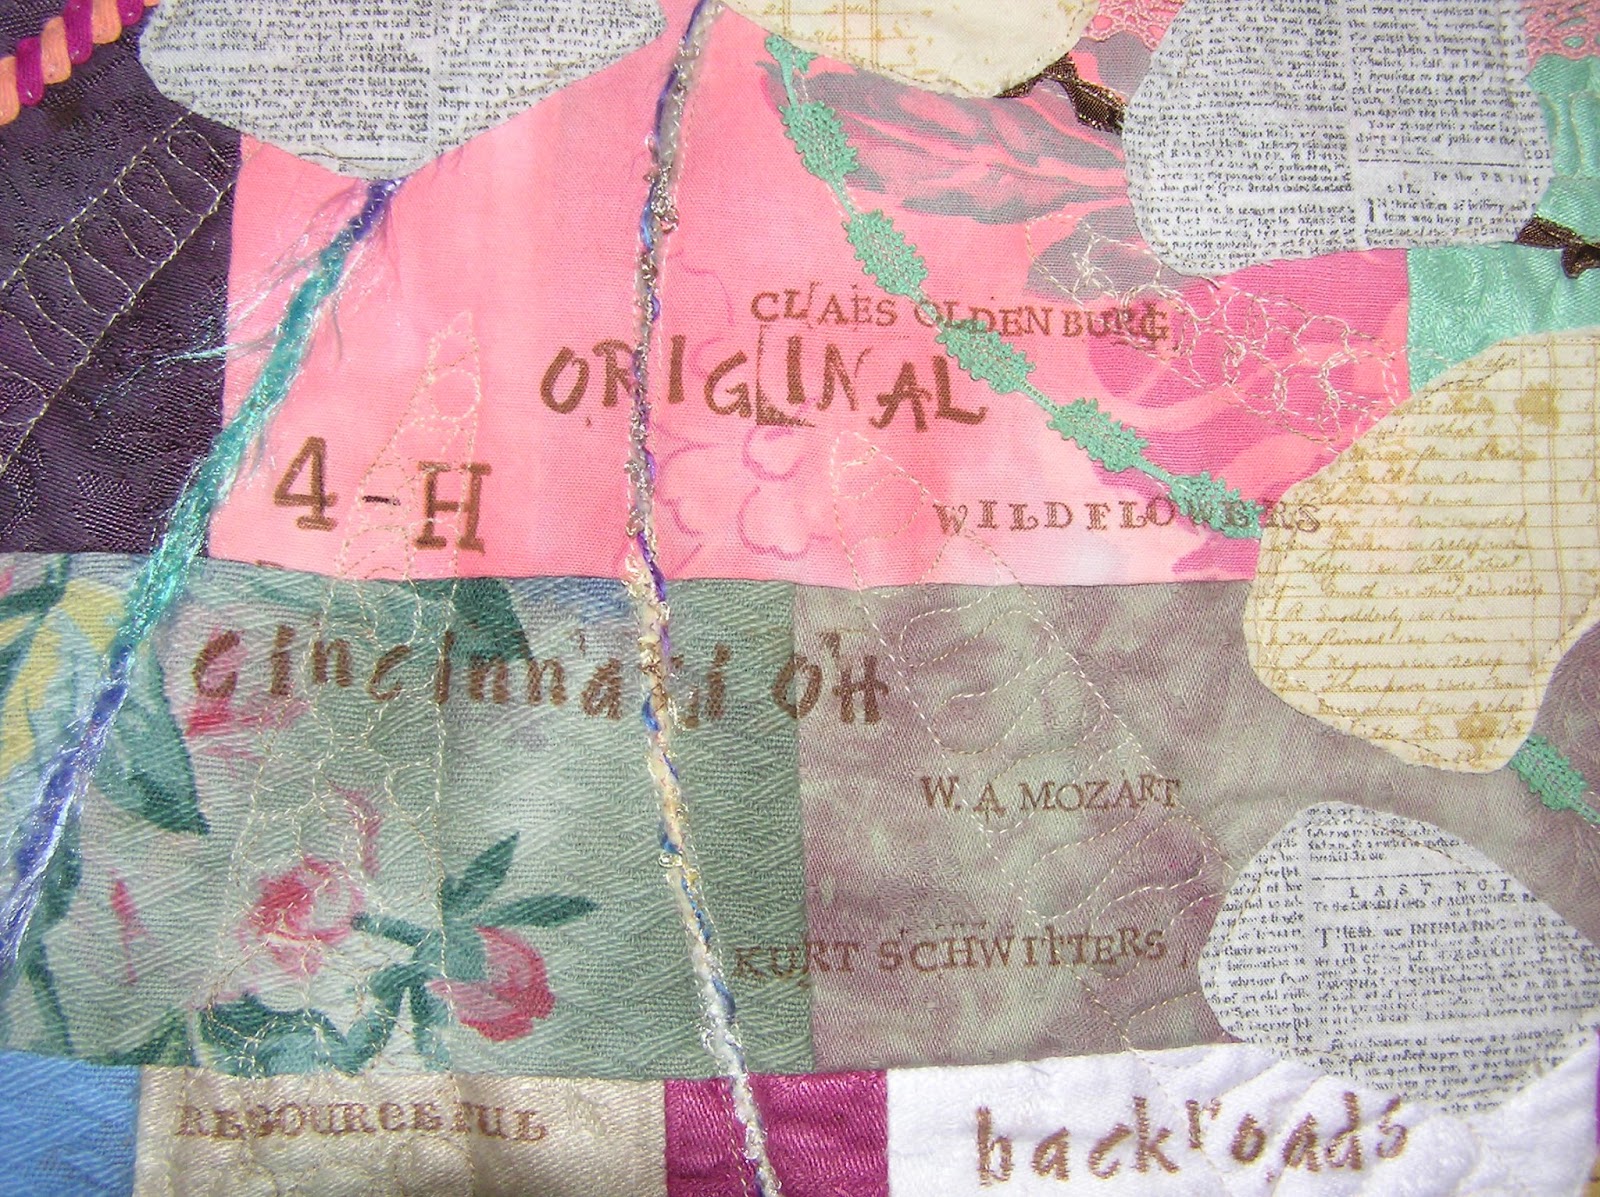
It was an experiment, not completely successful.  While I made it, I had in mind the paper collages of Kurt Schwitters (scroll down on the link for images of his work).  I think the influence of Schwitters is evident in my collage.  However, it is a bit of a wreck in the technique.  My most significant fault with my purple collage is the trial of sewing a slightly smaller quilt base, allowing the edges of the purple dyed damask napkin hang free.  I will not do that again!  It was hard to quilt near the edges, and I just don't like the floppy edges.  Additionally, the quilting made the whole thing lumpy!  The next collage that I make using a dyed napkin for a sub-base will have a slightly larger quilt base, not smaller.  I would like to try mounting future collages on canvas and stretcher bars, like a painting.  I have heard of other textile artists having good luck with that method, citing that would-be buyers relate to the treatment better. 

Another thing that I like about the collage is the seed stitching I did to create an unobtrusive border.  The stitching was necessary to try and secure the floppy edges, and it added more texture.  Not only is there paper sewn into this piece, but there really are pieces in there that would have been trash!  There are foil chocolate wrappers and plastic mesh produce bag pieces in the mix.  Look around as you go through your day with a vision to find unusual materials to stitch. 

Despite the problems, I really had fun making this and I still love it as a learning experience.  I will hang it somewhere in my house, as it is still a visual delight to me.  I hope to start my next collage this weekend.

Wednesday, August 30, 2017

Quilt National 2017

As I mentioned earlier, I visited the biennial Quilt National show earlier this summer.  This was the third trip to QN for me.  The first show I attended in 2013 was incredibly inspiring for me, and I was astounded by the variety of techniques and pleased with the blend of representational images and abstract constructions.  The next QN that I went to in 2015 fell short of that excitement and energy that I felt from 2013, but I still think the variety was there (a crucial element to me for an art quilt show).
The Dairy Barn, Athens, OH, home of Quilt National

This year, I left feeling rather confused.  I didn't feel that there was much variety in overall techniques.  After viewing the quilts and studying the catalog for a few days after, my confusion only worsened.  There were many quilts in this year's show in which I am struggling to see what the artists want me to see.  What am I missing?

More on Friday...

Wednesday, February 22, 2017

Time Goes By

The three day weekend was not as productive as I had hoped, at least in the way of sewing.  The weather was too nice to stay inside!  I did a good bit of yard work and planning for this year's gardens.  I am pleased to report that my two little woad plants are doing well.  I am embarking on a seed saving venture with these biennials, so maybe in a few years I will be able to get some blue fabric from them.

The only thing I have to share in sewing progress is this:

How about that for extreme couching!  That is a whole bunch of fancy yarn, dyed lace trims and silk sari ribbons, all machine zig-zag couched.  It is a piece of a larger fabric collage.  I hope to have enough of it finished soon to share here, maybe in a month.  I am thinking of making a small piece, 8 X 10" that is just a mass of couched fibers.  It takes a long time to do these rows of couching, but I love the look.

This will be my only post this week.  I have another installment of the art journaling workshop tomorrow, so I'll have something about that next week, some book recommendations and musings on why I have checked out a small stack of children's books from the library, when I don't have children!  Yes, it has something to do with art quilting...

Thursday, February 2, 2017

Art Journaling

I mentioned in my last post that I am enrolled in a three session class on art journaling.  So, just what is meant by art journaling?  As I am discovering from the class and from a small mountain of library books on the subject, it could be taken several ways.  Usually, an art journal is a personal journal that is illustrated with drawing and painting.  It could also be a journal about the art that you make, or a journal about the art museums and galleries that you visit, and I’m sure there are few other possible definitions.
                                               
I’ve attempted to keep journals of sorts for some years now, and I thought that this class would introduce me to a new skill.  As it turns out, I have already been art journaling to some degree.  My journal of life events is augmented with my own photographs, and sometimes drawings.  I have another journal of art quilt ideas and notes on the progress of my quilts.
Image copyright RPS.  Please do not copy or repost


Above is a journal page documenting the first fabric box I made for a guild challenge.  There are scraps of the hand dyed fabric I used, and one of the viewer's choice ballots that were cast for my box.  No, I did not win viewer's choice, but a few people noticed it!

Yet another journal is a record of the quilts I am making from the lessons in The Art Quilt Workbook by Jane Davila and * and A Fiber Artist’s Guide to Color and Design by Heather Thomas.  As I am still learning the ins and outs of sewing and art quilting, this journal is a way for me to record my mistakes and the things that I get right.  It is not easy to remember everything when you’re learning a new skill.
Image copyright RPS.  Please do not copy or repost


I also have the fabric book that I made from Fabric Embellishing: The Basics and Beyond by Chandler, Kettle, Thomas and Vleck.  Not only is this a sampler of techniques, I also added mentions here and there of events in my life as I made each page.
Image copyright RPS.  Please do not copy or repost


I guess I am ahead of the game a bit with this class, but I have already picked up more ideas to try, and I am really looking forward to the time with other creative people.

Thursday, January 12, 2017

That Purple Collage, Yet Again

If you get anything out of this ongoing series on this fabric collage, it is that art work usually does not happen overnight.  This is one factor in why good art is seemingly pricey.  This particular piece however, I'm not sure would fall into the category of good art, not yet, and maybe not ever!

I decided to add decorative stitching around the edges of the fabric pieces.  The first image below is a detail before I started the hand stitching, the next one is after.


The stitching adds a lot, doesn't it?  This pair of images is also a good illustration of how different lighting affects something.  The first image is in natural light, the second was taken with flash.

My next step is to join the collage to the three layer back, and quilt them together.  I am thinking ahead for once, and trying to decide how much more I should add to this collage.  I could add more fancy yarns:


How about more trim and some doilies?


I am going for a heavily textured creation, though I don't want to completely cover the lovely purple napkin that serves as the base.

Where will it end?  I don't know yet...

Thursday, December 1, 2016

Getting Sidetracked

Despite what it appears, I have added a few pieces to the collage.  I had intentions to add more in time for this post, but I realized that I have to quilt this thing at some point.  Right now, it is only a top layer, with no batting or backing.
image copyright RPS, please do not repost

The stitching of the three layers to make my collages (technically) into quilts is a struggle for me.  I don't want the quilting to dominate the design and I tend to neglect this crucial step until I have embellished to the point were there is very little chance of me stuffing the mess under the presser foot of the sewing machine.  Not to mention at that point, adding quilting would flatten the fabrics, ribbons, etc. that I attach to come up off of the collage surface.  This piece will be be an experiment in minimal quilting in the currently open areas of purple base fabric, then back to the embellishing.

So, my next plan for this post was to dive into instructions for pillowcase binding, as requested from several customers of mine.  I have not found a piece of backing fabric to suit me, despite tearing through the fabric storage room not only in search of backing, but also on a quest to locate another half finished collage quilt that I want to finish soon.  It has been one of those weeks.  Time for a trip to the local quilt shop...

Tuesday, November 29, 2016

Quilt National Catalog Binge

Thirteen Quilt National catalogs, and that's not all that are out there!  In my still ongoing study of the Quilt National catalogs, I have noticed an expected increase in the innovation and creativity expressed in the entries.  I realize that it is useless for me to really discuss the QN shows here, as I cannot illustrate my points with images from the shows.


One thing I will discuss is a bit of a revelation happening within myself.  I am realizing that there are a surprising number of quilts through the thirteen catalogs that I cannot explain why they should be considered good art.  Now wait, I am not questioning the jurors or artists, I am questioning myself.  What is it that four other people see that I am not seeing? (The four people being the artist and the jurors.)  This struggle of mine is not exclusive to the QN catalogs.  I'm having the same trouble with nearly all of the the artwork illustrated in two books by the same author/artist on becoming a more creative painter.  I have the same feelings about nearly all of the contemporary artwork that museums and galleries think is fabulous.

I am often missing what the artist explains in the statement for the particular piece in the QN catalogs.  It does not matter if I look at the quilt first, then read the statement, or vice versa.

As I said in the last post, we do not have to like everything, but why am I sour about so much?  How many of you out there consistently find yourself indifferent or worse towards the majority of works in an art quilt show?  I find much that I consider innovative and amazingly creative, but so few quilts that I want to look at for more than a minute or so.

Sometimes, it is incredibly difficult to sufficiently explain why we like or love something.  This will be something I will be paying attention to more, to the point of adding to my journal the things I see in artwork that rocks my world.

Thursday, November 17, 2016

Making Progress

Since my last post, I have sewn all the fabric pieces onto my collage-in-progress and I added more couched funky yarns.  Time to step back and evaluate it.  One way to see a work-in-progress a bit differently is to take a picture of it and make your evaluation from the picture.
image copyright RPS, please do not post elsewhere

Right away, I notice that the two dark purple lace pieces are aligned nearly the same way.  I like to have similar elements in a piece turned different ways.  I'm not going to rip one of them out, I will add another dark purple lace later, making sure to place it a perpendicular angle to the first two.  I've probably mentioned before, but it is a good idea to use each design element more than once in a piece.  I need to add one more of each of the purple laces, so this will be easy to fix.

Since I am using several different techniques in this collage, I like to keep switching back and forth in the application of them.  I'm not sewing all the fabric pieces at once, then the couching, etc.  Instead, I sew a couple of fabric pieces, couch a couple lines of yarn, add a lace trim, then back to fabric.  I'm not sure if it matters, but I would think that my back and forth method creates a more layered look.  Well, there's another future project to test my hypothesis...

Back to evaluating a work.  While I have a photo of the piece, I like to view the image in black and white too.  This allows me to see how I'm doing with contrast of value.
image copyright RPS, please do not post elsewhere

Clearly, I need to add some darker shades and some pale tints.  The fabrics, trims and yarns I have selected so far are too alike in value.  The same two lace pieces that are bothering me for the way I placed them are the only dark elements now.  It is important to have strong value contrasts to add more interest to a composition.  The background is a nice middle tone, most of the added pieces are about the same lighter value.  The more I look at this image, I think I might be OK if I add a few more dark pieces.  I have some work to do here!

Thursday, November 3, 2016

Collage Continuation

Welcome back to the creation of my latest fabric collage.  I thought that I would sew more pieces down this afternoon, but I spent a lot of time thinking about what I wanted to do.  Some days are like that.  So far, all I have on the collage is flat fabric.  I want more texture in this.

I've had to rethink the attachment of the lacy trims and funky yarns that I love so much.  I don't want the ends unraveling, so I have to come up with a way of hiding the ends on a seamless base.  The obvious solution is to hide the ends under the fabric pieces that I will raw-edge applique to the base.


I don't want every trim end to start and end underneath fabric.  This is a design element, to vary what I do with a particular material, adding visual interest.  To avoid the unraveling of crocheted trim, I simply will fold under 1/4" of the ends that I don't hide under fabric.  

On this piece, I decided where I wanted the trim piece, and flipped it back to sew it as a short seam.  After trimming the first stitching line, I put the trim back in place and sewed the top edge.  The other end will be hidden under a fabric scrap:

Another consideration in design is to use a specific element in more than one place in a piece.  Keeping this in mind, I cut another piece of the light green trim to try sewing it by tucking under both ends and not hiding them under fabric.

Success!  It might be easier to sew the ends under by hand, or fuse with bits of Mistyfuse, then sew.  Sewing this piece by machine wasn't too bad.

 Onward with the trim!  I also will add some silk sari "ribbons" with this technique over the next few days.  On Tuesday, I plan on discussing machine couching.  For now, I have sewing to do...

Tuesday, November 1, 2016

Continuing with Collage

Back on August 19, I posted about creating a fabric collage using one of my hand-dyed vintage damask napkins as a base.  The first step looked like this:
Image copyright RPS, please do not repost elsewhere

I did not get any further on that project, so it is now time for me to take it up again.  I fielded numerous questions on techniques at quilt shows in the past three months, and I realize that I can answer most of them by writing about the progress of this collage.  If you are one of those I advised to check my blog in the near future regarding your inquiry, the future is here!  By Thanksgiving, I plan on covering machine and hand couching of fancy yarns, designing-as-you-go, pillowcase binding, and other fun ideas.  If you bought one of my Creativity Kits, and are looking for ideas, the next few weeks here will reward you (I hope...).

I have the collage out on my table again, and I have selected a pile of threads, ribbon, trim, yarns and dyed doilies to select from to start embellishing:
Image copyright RPS, please do not repost elsewhere

Already, there is a problem!  Since I do not have any seam lines from piecing on this collage, I cannot hide the ends of trims, ribbons or yarns like I would on a crazy quilt or other pieced and embellished quilt.  Normally, I'd be careful to plan my embellishing order of sewing so that ends would get hidden by another piece of trim, as you see here:
Image copyright RPS, please do not repost elsewhere

Check back Thursday to see if I come up with a decent solution.